TABLE OF CONTENTS
Introduction
This feature is used to create new email senders from inbox authorization or domain authorization methods.
CustomerGauge allows you to set up:
- Your own subdomain
- A CustomerGauge domain
- An inbox-verified sender
Feature Notes
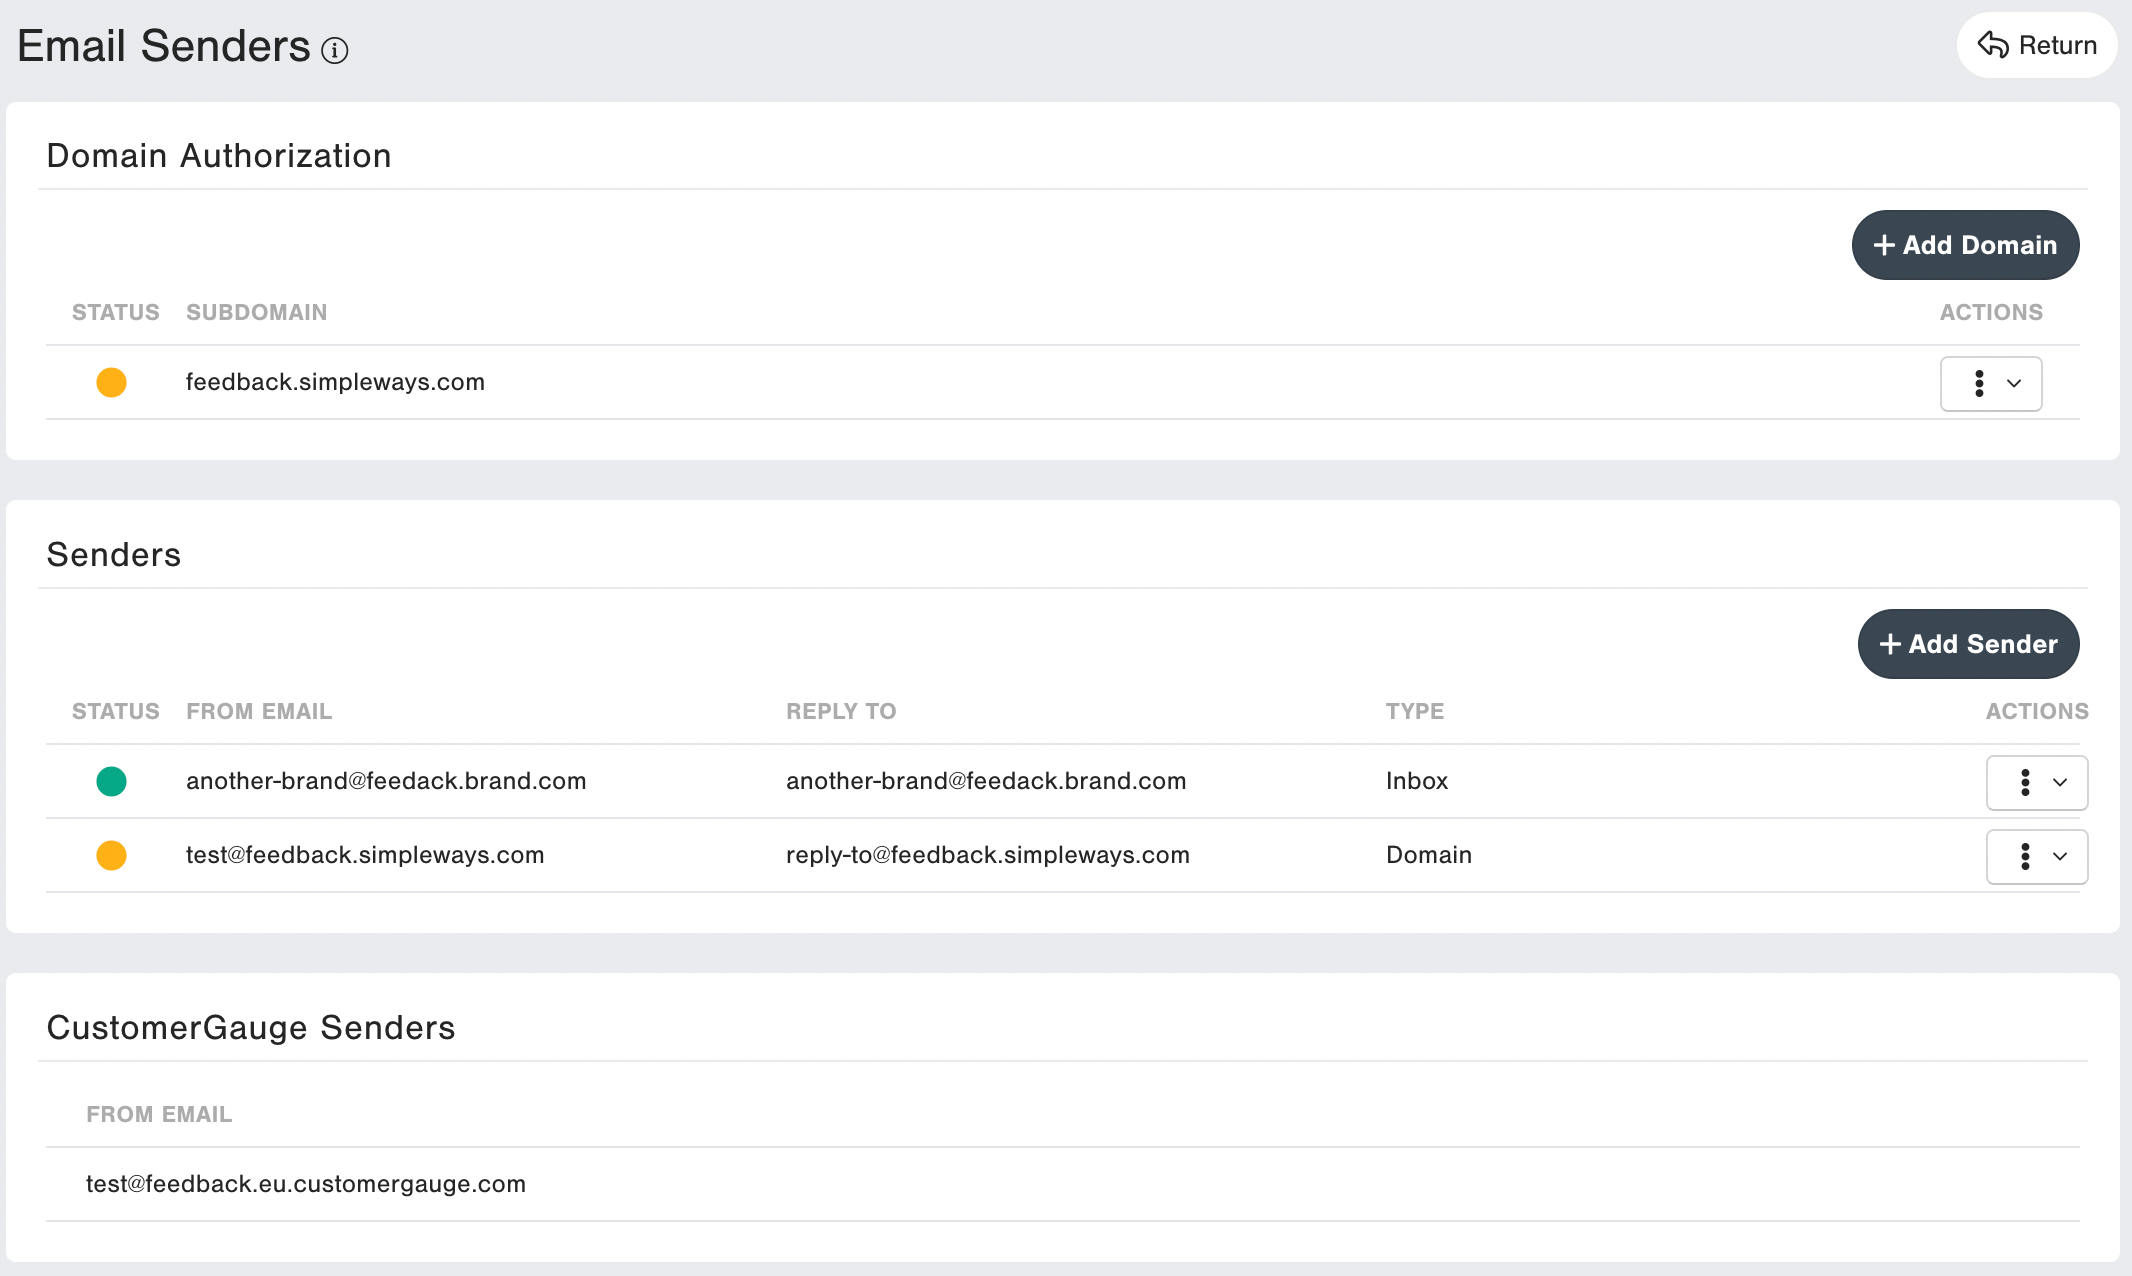
- Green status means the domain or sender is authorized.
- Yellow status means the domain or sender authorization is still pending.
- Red status means the domain authorization has been permanently rejected.
- You will need the support from your IT team to set up the DNS records of your subdomain sender.
Custom Subdomain
Good to know before you start
- You will need help from your IT team to set up the DNS records for your subdomain email sender.
- You must setting up DKIM, SPF, and DMARC records for better email security and inbox placement. Amazon SES needs you to publish an MX record to receive bounce and complaint notifications from email providers. You also need to publish an SPF (TXT) record to show that Amazon SES is allowed to send emails from your domain. For more details regarding configuration, check this link: Amazon SES Mail From.
- For more details/context about why this is important to do, see below.
We suggest using subdomains for different email types. For example, send marketing emails from marketing.example.com and survey invitation emails from feedback.example.com. This way, each subdomain builds its own reputation. If one subdomain's emails are marked as spam, it won't hurt the others.
For more best practices, check out Amazon's best practices.
In order to follow legislation in countries such as France or Italy regarding email open tracking without consent, it is also necessary to set up a custom subdomain and open a request with CustomerGauge to disable email open tracking on that domain.
How to setup
1. Navigate to Settings → System Admin → System Settings → Survey & Campaigns → Email Senders.
2. Click on +Add Subdomain.
3. Fill in your desired subdomain.

4. Click on Save.
Important: In order for any sender created based on the subdomain to work, the subdomain needs to be authorized. Your tech team will need the DNS Records in order to authorize the subdomain.
Get DNS Records
1. Navigate to Settings → System Admin → System Settings → Survey & Campaigns → Email Senders.
2. Under Actions click on ⋮ and then on View DNS Records.

3. Add the provided information to your DNS records - this step requires you to get in touch with your tech team.
Verify Authorization Status
Once the information has been added to your domain's DNS records, click on ⋮ under Actions menu and then click on Verify Status.
Please note: it may take a while for your DNS records changes to propagate, if the subdomain status is still pending, try verifying after a couple hours.
Important: You will need to Check Status within 72 hours of adding a subdomain in CustomerGauge.
Add New Sender From Authorized Subdomains
Good to know before you start
- If you don’t want to receive direct replies, you do not need to create an inbox for the email address. However, if you set up an inbox, you can create an automatic reply to let your customers know that the inbox is not being monitored.
- On the other hand, if you do want to receive the direct replies, ensure that you use a sender email from your authorized subdomain which has an inbox that is monitored.
How to setup
1. Navigate to Settings → System Admin → System Settings → Survey & Campaigns → Email Senders.
2. Click on +Add Sender.
3. Select From authorized subdomains.
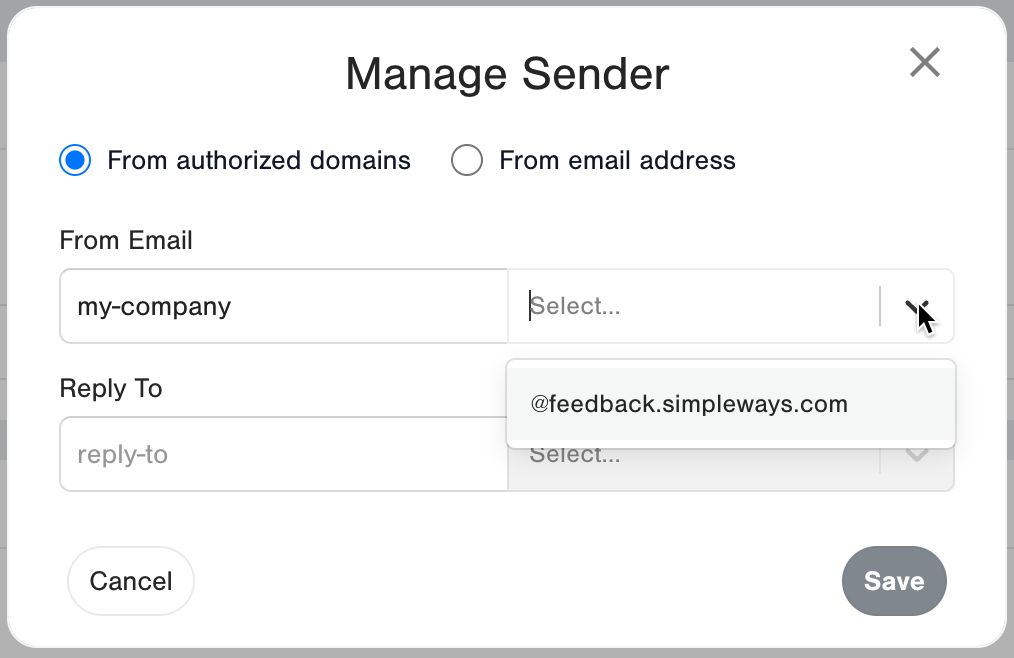
4. Select a subdomain from the dropdown and type the desired From Email.
5. Fill in the desired Reply To email and then click on Save.
Please note: the senders added from subdomains are dependent on that subdomain's authorization. You will need to authorize the subdomain in order for the sender to work properly.
CustomerGauge Sender
Important: Although we provide a default sender from our own subdomain, we see higher response rates with customers using their own subdomain when sending campaigns. Sending from your own subdomain increases the response rate as recipients will recognize your brand.
Direct replies are not supported when using the CustomerGauge default sender. Anyone who replies to the CustomerGauge default sender email will receive the below reply:
Hello, This is a no-reply email address and your response will not be received by the designated organization. Thank you for your attention. Best regards, CustomerGauge |
Note: Disabling email open tracking on the CustomerGauge Sender is also not possible. In order to have a sender that does not have email open tracking enabled, it is mandatory to create a Custom Subdomain.
Add New Sender from Email Address
Good to know before you start
- This option is known have low reputation and/or inbox placement, and is not recommended outside of testing.
How to setup
1. Navigate to Settings → System Admin → System Settings → Survey & Campaigns → Email Senders.
2. Click on +Add Sender.
3. Select From email address.

4. Fill in your desired From Email.
5. Amazon will send a verification email to the email provided.
6. After the verification, find the email in the senders list and click on ⋮ under Actions, then click on Verify Status.